
Using smart links for Office 365

Just a few years ago identity federation such as AD FS was the de facto standard for managing...

A few weeks back, Microsoft announced the Public Preview of a new and very interesting feature, named Attack Simulator. The idea behind Attack Simulator is to give you a safe toolset to use in order to probe some aspects of the security of your organization when it comes to email hygiene and password strength, with more to come in the future. In this article, we will do a quick overview of Attack Simulator.
The Attack Simulator tool started its life as an internal Microsoft tool, built by one of their security teams with the goal of raising awareness to common attack factors and reducing the overall risk. The tool proved very successful and in turn Microsoft took the logical next step by deciding to make the tool available for all Office 365 customers. After a Private preview, Attack Simulator was opened for a Public preview at the end of February and shortly after made available for all customers with an E5 subscription. You can read "Announcing the Public Preview of Attack Simulator for Office 365 Threat Intelligence" over at the Microsoft Tech Community.
As mentioned above, Attack Simulator is part of the Office 365 E5 SKU. Alternatively, organizations can purchase the Office 365 Threat Intelligence add-on in order to get the feature. Few other important requirements must be met. First of all, Attack Simulator is currently only available for users with mailboxes in Exchange Online, as part of the feature relies on direct access to the mailbox store, which we will discuss in more detail later. In addition, an attack can only be launched by an administrator that has passed a Multi-factor authentication challenge, meaning that in order to access the feature your organization must have configured MFA.
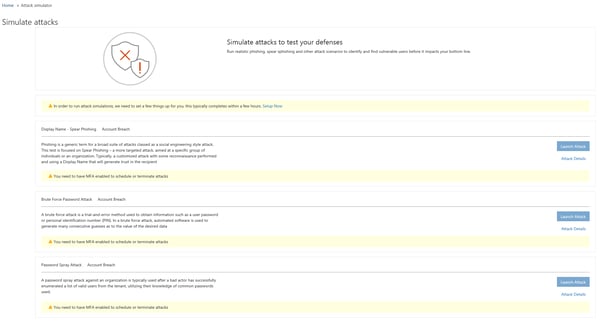
If all those prerequisites are met you can head out to the Security and Compliance Center, expand the Threat Management menu on the left navigation pane and click on Attack Simulator. Alternatively, you can use the direct link. If this is the first time you are accessing the feature, you will notice a small warning on top and you will have to press the Setup Now link to enable the feature, as displayed on the below screenshot:
The process might take a while to complete, so be patient. Until the underlying setup is complete, the portal will display the following as a warning: “The setup is complete, but please wait a few hours before you try running your first attack simulation”. Once everything is prepared, the warning will disappear, and you will be able to proceed with creating an attack.
As evident from the above screenshot, the current version of Attack Simulator offers three types of attacks: “Display Name – Spear Phishing”, “Brute Force Password Attack” and “Password Spray Attack”. All three fall into the “Account Breach” category, but in the future you can expect a larger number and more diverse attacks to appear. For the time being, lets configure a Spear phishing attack for our tenant.
An important note is due here – the Launch Attack button will only be available if the account you are using to access Attack Simulator has succeeded in performing a MFA challenge as part of the authentication process. This is alluded to by the “You need to have MFA enabled to schedule or terminate attacks” warning visible on the above screenshot, but the requirement is not only to have MFA enabled on the account, but to actually login by completing a MFA challenge. This might be an inconvenience for organizations that do not enforce MFA or use some form of MFA bypass, however it makes sense to have this additional security verification enabled for working with one of most sensitive functionalities currently available in Office 365.
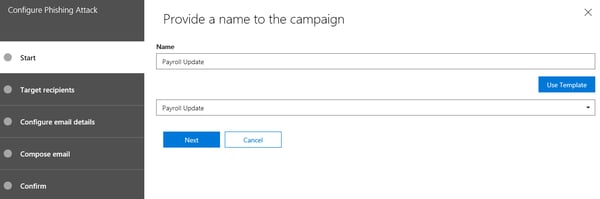
Assuming you have the Attack Simulator feature available in your tenant, as well as the necessary permissions to access it and you have met the MFA challenge, you can press the Launch Attack button and configure a Spear phishing attack. On the first screen, you will be prompted to specify a Display Name for the attack, with the option to Use template (the currently available ones being “Prize Giveaway” and “Payroll update”). The display name you choose here doesn’t necessarily correspond to the Subject of the phishing message you will be sending.
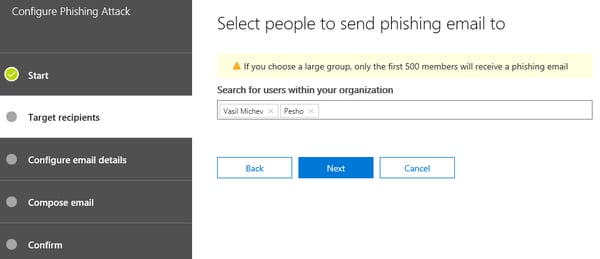
Once the name is configured, press the Next button to continue to the Target Recipients page. Here, you can specify which users in the organization will be targeted by the attack, either by naming them individually or selecting a group. Office 365 Groups are not yet supported. The interface here can feel a bit clunky at times and can use some improvements in terms of speed and validation checks, but in general you should have no problems on this step. Here’s how it looks like:
The next two steps are the most important ones – you now have to Configure Email Details for the phishing message and then Compose Email message that will lure the unsuspecting users into clicking a link. The more believable the message is, the better the value of the Attack Simulator exercise, so take your time with the process. If you have selected one of the templates on the first step, some details will already be pre-configured.
The From (Name) and the From (Email) field allow you to specify the display name and the email address of the sender of the message, respectively. The email address you specify can be external or internal, depending on the type of attack you want to simulate. It is important to understand that the message will not travel the EOP and Exchange transport pipelines, thus the recipient resolution will be performed by the client. In effect, this allows you to craft a message which sender is indistinguishable from say, the CEO of the company.
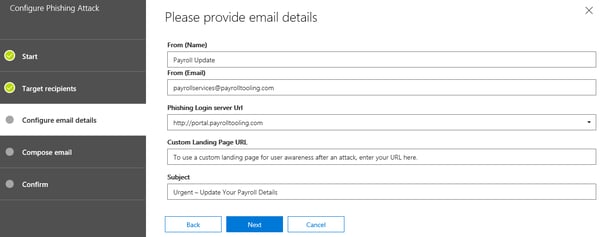
Next, you can use the Phishing Login Server Url drop-down to select from one of the predefined URLs to which any user that clicks the link will be directed to. Those websites are designed to look and feel like the real thing, so unless the user is extra careful he or she might end up providing his credentials, thus falling victim to the attack. You can also configure a Custom Landing Page URL to which to redirect users after they have failed the test and provided their credentials. No templates are provided here, so you will have to craft your own page. If you leave the field blank, a generic page will be shown (see below). Before configuring the Email body, you should also make sure to provide a proper Subject line for the message. Once done, press the next button to continue to the Compose email page.
The body of the email must be provided in HTML format, which in turn allows you to customize it with custom logos, pictures, fonts and so on. The built-in editor offers an easy to use WYSIWYG interface as well as the option to directly edit the source. You can of course use your favorite HTML editor instead and just copy/paste the message. Make sure to take advantage of variables such as ${username} in order to make the message look more personal.
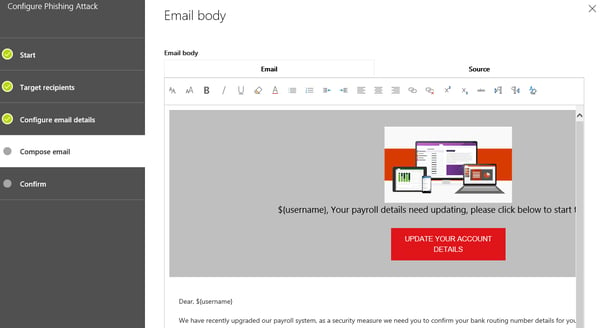
One can easily take a legitimate email’s source and copy/paste it into the Editor, then change one of the links in the message to point to the phishing URL (which can be referenced via the ${loginserverurl} variable). Make sure to validate the HTML code though, as the editor included as part of the wizard is not very robust and will not warn you about code errors, which in turn might result in an error message later on when you try to start the attack.
Once you are satisfied with crafting the phishing message, press the Next button to the Confirm page, where you can start the attack by pressing the Finish button. The attack will commence immediately, as there is no option currently to schedule it to run at a later time (this is coming in the GA version though). In addition, the interface doesn’t make it easy to work with multiple attacks of the same time, at least for the Preview version of the feature.
As already mentioned above, Attack Simulator uses a special delivery method and directly writes the message to the mailbox store(s) of the intended recipient(s). In effect, the message bypasses the transport pipeline and any anti-spam and anti-malware checks provided by EOP and/or ATP. This in turn means that if an internal address is specified as the message sender, Outlook will happily provide you with the Contact card of the actual recipient object, including the picture, title and so on. Here’s an example phish message that uses my own account as the sender:
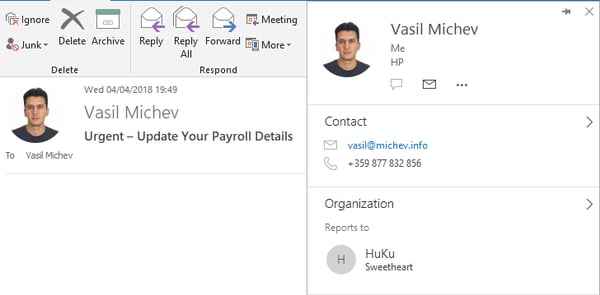
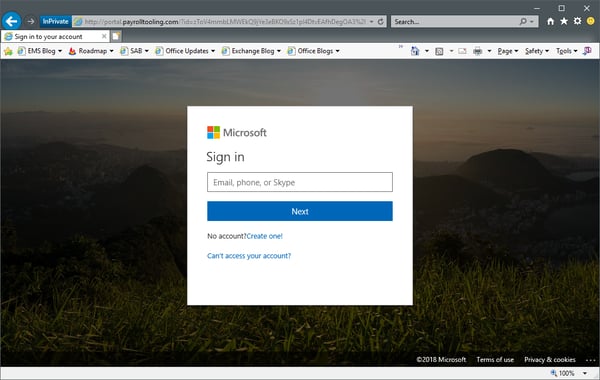
If you take into consideration just this part, the phishing message will be virtually indistinguishable from a real message, which is what makes this feature so powerful. In addition, having bypassed all the transport layers, the message will have no headers, any links within it will not be affected by the Safe links feature and so on. Here’s an example of using the predefined Payroll update template, this time without changing the sender name to my own address:
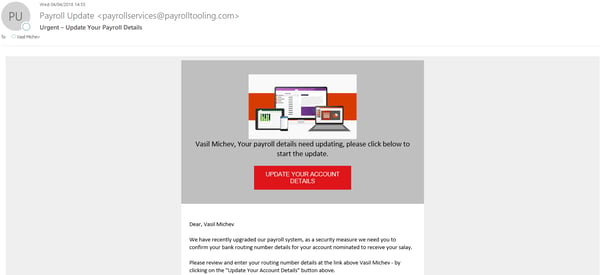
The screenshot above illustrates how the message looks like in Outlook once you have allowed it to download the image(s). The important links is embedded as part of the “Update your account details” button, pressing which will take you to the phishing site using a unique identifier, which in turn will later on allow us to determine which users failed the test and followed the link. The phishing site itself mirrors the Office 365 login page:
As with the email message, there are small discrepancies that can alert you to the fact that you are being scammed, which is not a bad thing – after all the point of this exercise is to evaluate the user’s ability to spot those. Failing to do so and providing a username and password will result in the user being flagged in the report generated after the attack is complete. In addition, the user will be taken to the page you specified via the Custom Landing Page URL above, or the default page, where he will get some basic information and hints.
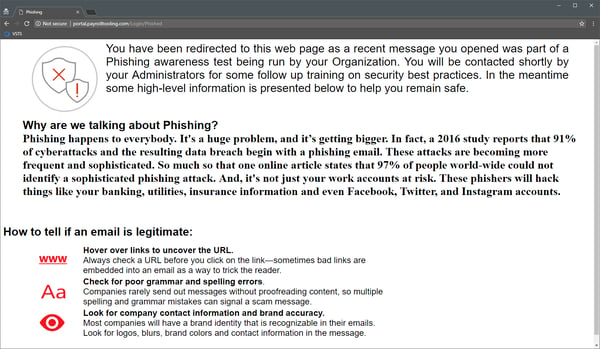
Note that at no point during the simulation the actual username and password provided are collected or validated against the service. In fact, you can enter any value you want for the username and password and still end up on the “Phished” page and in the report. It’s the act of following the link and providing credentials that counts.
Once sufficient amount of time has passed since the phishing attack attempt was initiated, you can review the status of the attack via the Reports functionality. To do so, navigate to the Attack Simulator page in the SCC then click the View Report link next to the attack in question. To check the report on older attacks, you can press the Attack Details button, where they will be listed in historical order. Here’s how an example report will look like:
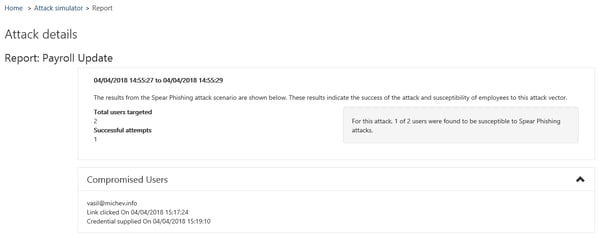
The information provided will include any user that clicked the link and/or provided credentials on the phishing site. There is currently no way to export this report from the portal, but once the feature is GA this issue should be addressed. In any case, using the list of names in the report will be your starting point for the next stage of the campaign – working with the users to raise awareness and hopefully prevent such behavior in the future. Microsoft is also evaluating the option to provide some actions directly on the reports page, such as enabling MFA for the user.
In this article, we did a short overview of the Attack Simulator feature in Office 365. With few clicks in the portal, Attack Simulator allows you to generate a phishing attack that will bypass the defenses provided by EOP and/or ATP and will ensure the message lands in the target user’s mailbox. By using some of the predefined templates or putting some effort in crafting your own branded and well-designed message, you can test how your users react on phishing attempts and based on the results, take any necessary measures.
While the feature offers several methods to probe the security in your organization with respect to user behavior and password strength, due to the limited space here we only covered the phishing scenario. Make sure to try the Brute Force and Password Spray attacks as well, and keep an eye on the feature as it expands to feature more scenarios. Microsoft plans are to release it officially over the course of the next few weeks, but as usual timelines might shift.
UPDATE: Microsoft announced the General Availability of Attack Simulator on April 17th.


