Building an Exchange LAB Environment: Provisioning Exchange Servers

In this, Part 4 of this ENow blog series, I will take you through the provisioning of your Exchange...

Times change, people change – and as well all know, technology changes as well. The last part of that sentence could not be more true of Windows, Active Directory and Exchange Server recently.
Back in the day (from around 2000 / 2001) – you could set up a working Active Directory / Exchange environment up in your test lab probably in a day. However as the products have evolved over the years the feature set has expanded there is much more to consider, and a number of traditionally familiar ways of doing things have changed.
Whereas it is probably wrong to say that things have become more complex (although to a certain degree this is also true) – the gap between terminology and processes to get your environments up and running has expanded between Windows 2000, 2003, 2008, and Windows 2012.
So, with this borne in mind I have decided to put out an article series which takes you through the process of setting up a simple Exchange 2013 test lab from scratch on Windows Hyper-V server. As I go through the series I will pass on some tips and Powershell scripts which hopefully will make you lives easier – as well as demonstrate some of the areas that have had a major overhaul in both Windows and Exchange.
Configuring Hyper-V
This article is based around Hyper-V 3.0 which shipped with Windows 2012. I am personally using Windows 2012 Core with the Hyper-V role installed, but the processes within this article also apply to Windows Server 2012 Hyper-V installed with the full Windows GUI.
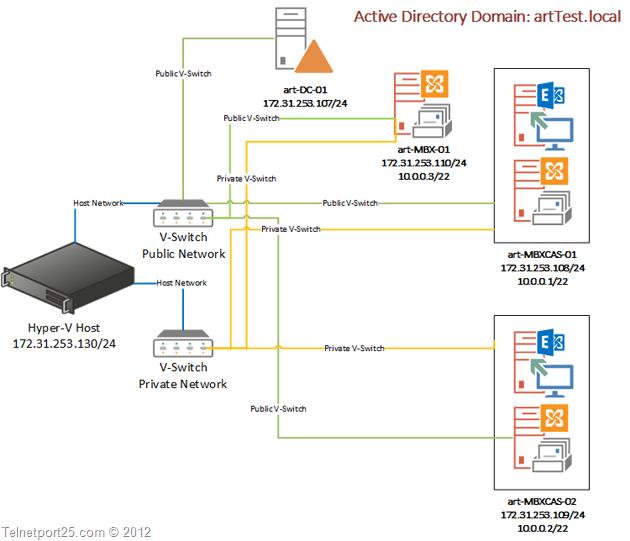
First of all – it is probably best to give you an overview of the topology of the lab environment that I have provisioned for this set of articles along with the specification of each Virtual Machine.

The Hyper-V host is provisioned with a single Inter i7 Quad Core processor and 32 GB of RAM. The server has around 4 Terabytes of usable storage connected via SATA 3.
I am running Windows Server 2012 Data Centre Core – with Hyper-V installed on the server.
At the networking layer – I have created two V-Switches within Hyper-V:
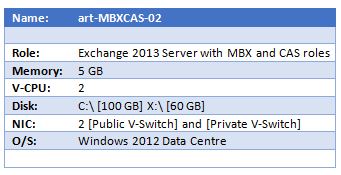
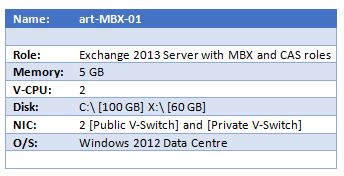
The environment consists of the following servers:
Provisioning the Domain Controller in Hyper-V
To provision the Domain Controller within Windows Server Hyper-V 2012 open the the Hyper-V Manager tool. When the management interface has loaded, from the “Actions” menu (on the right hand side) select [ New-> Virtual Machine ]. This will begin the New Virtual Machine Wizard.
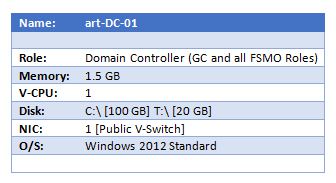
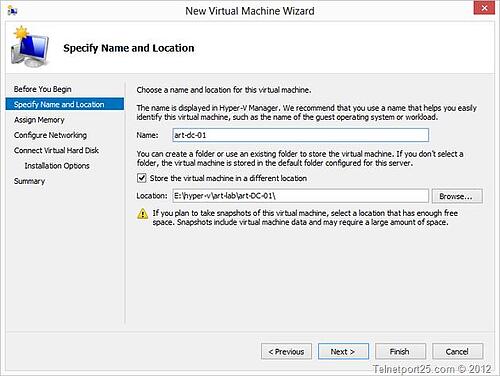
You will be asked to provide a name for your VM (I have used art-DC-01 – but you can call your domain controller whatever your would like). You should also choose the location where you would like the Virtual Machines files – you can either accept the default location that is configured within Hyper-V – or you can tick the “Store the virtual machine in a different location” tick box and select another disk.
When you are done click on the “Next” button.
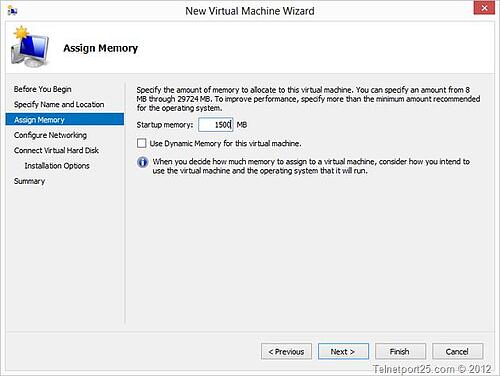
You will then be asked how much RAM you would like to allocate to your Virtual Machine – in my LAB I have chosen 1.5 GB – you can allocate more, but I would not recommend less. You can also choose to use Dynamic Memory for the VM. When you have finished click on the “Next” button.
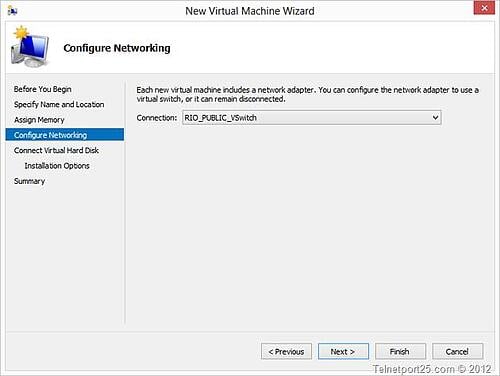
You will now need to configure the Network connection that you wish to make available to the Virtual machine. As I mentioned above, in my environment I have two connections, one Public and one Private. Select the connection in your environment that will allow for the VM to be visible to all machines on your network. When you are done click on the “Next” button.
You will then be asked to configure a system disk for your VM. You will need to give it a name, provide the location where you would like it stored (this should be with the VM configuration files), the size of the disk (I am using 110GB). When you are happy click on the “Next” button.

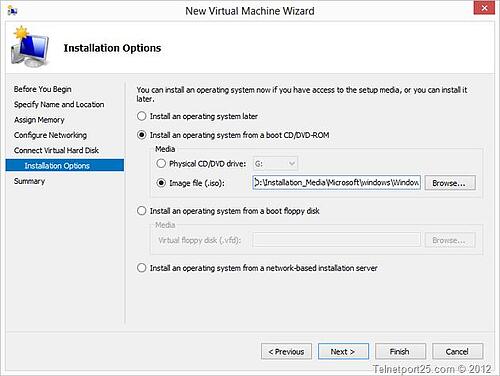
You will then be asked to provide the location of the Installation files for your operating system. I have downloaded the Windows 2012 installation ISO to a location on my Hyper-V host, therefore I choose the option “Install an operating system from a boot CD/DVD-ROM” and located the ISO. You will need to select the option which suites your own and then click on the “Next” button.
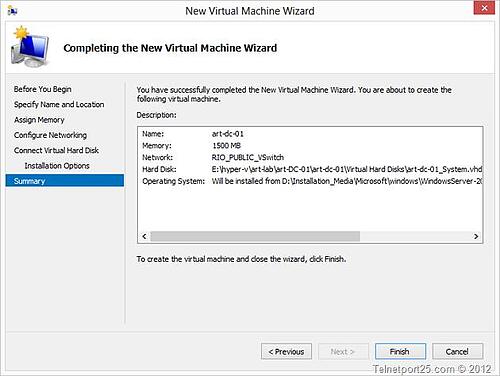
You will then be presented with a summary of your configuration options – please take time to review them, then click on the “Finish” button.
Installing Windows Server 2012
When your VM has been provisioned and appears in the Hyper-V Management Console – right click on its entry and from the context menu that appears choose the “Start” option. When then machine has started, again right click on its entry and from the context menu choose “Connect”.
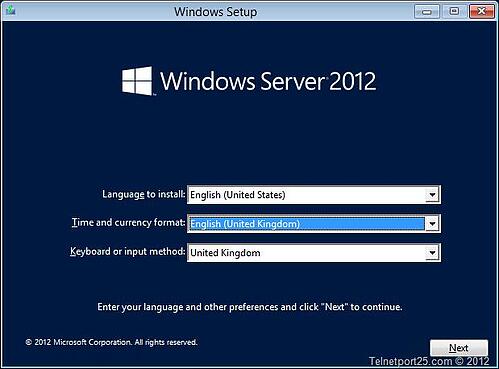
The Windows 2012 setup process should have begun and you should be presented with the Locale screen as per the example below. Choose the options that suit your own configuration best and then click on the “Next” button.
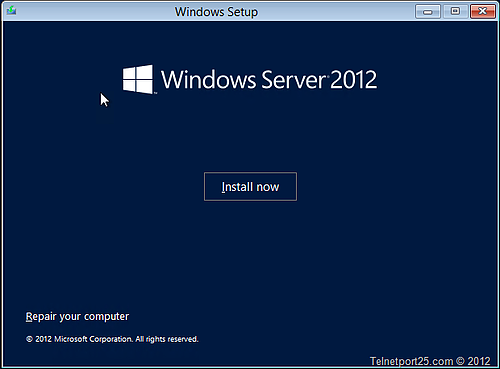
On the next screen click on the “Install Now” option.
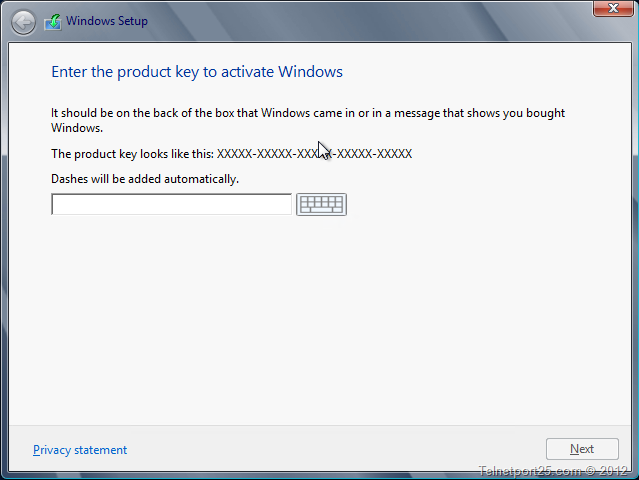
You will then be asked to provide your license key for the edition of Windows that you intend to install. Within my LAB the domain controller is going to be running on Windows Server 2012 Standard Edition, but you can provide a key for whatever version you are licensed for. When done click on the “Next” button.
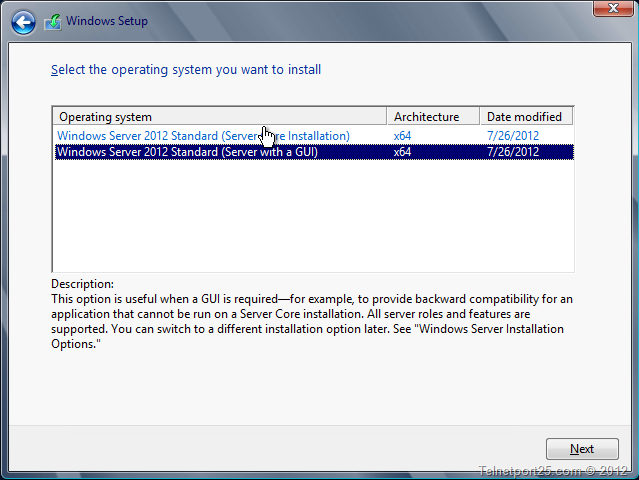
On the “Select the operating system that you want to install” screen – choose the GUI version of the O/S that you provided the license key for in the previous step. When you are done click on the “Next” button.
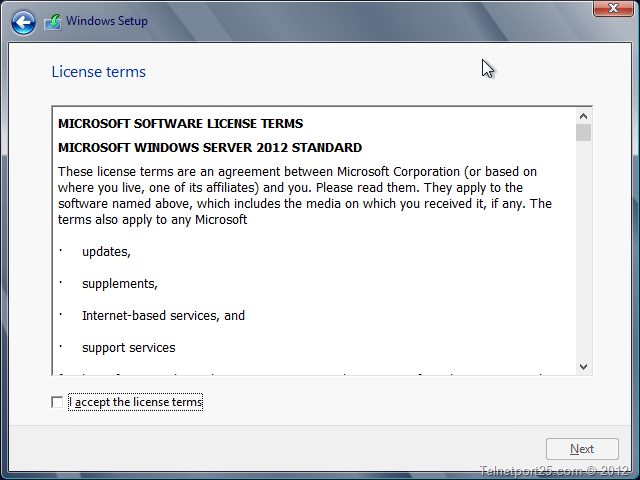
You will then be asked to confirm that you accept the licensing agreement for the operating system, select the “I accept the license terms” and then click on the “Next” button.
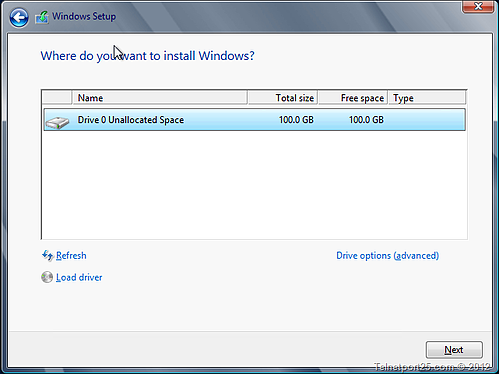
You will then be asked if you would like to upgrade an existing install of Windows, or choose a custom install – select the custom install option. This will give you the chance (should you wish) to customise the disk partitions of your VM. When you are done click on the “Next” button. For the purposes of my LAB I made no changes and gave the entire 100GB to the O/S.
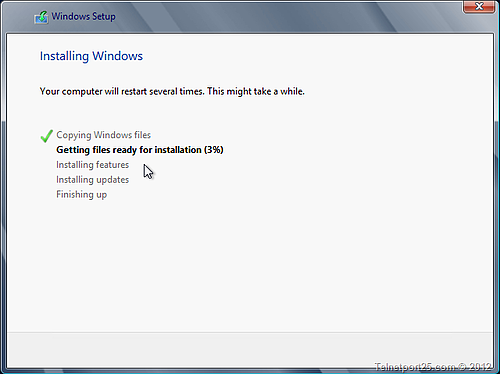
Windows setup will then proceed to install the O/S on your VM – there may be several reboots during this process.
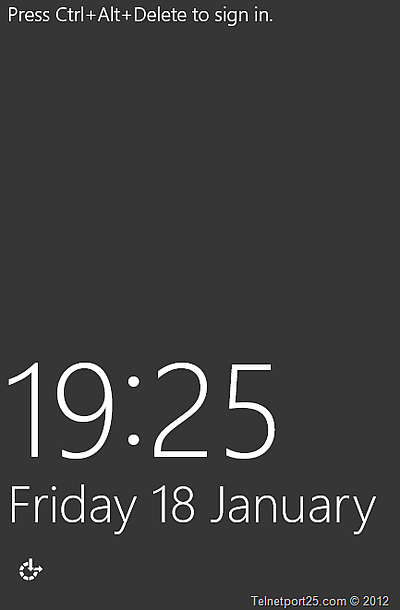
When Windows setup has completed you will be asked to provide a local administrator password for the VM.

When the password has been set – you will be able to log into your new VM and begin the process of configuring it as a LAB domain controller.
Configuring your Virtual Machine
When you have logged onto the VM you will need to configure a number of settings within your Operating System. In order to do this I will take you through how you can use Powershell to modify the following:
Configure Your Computer Name
Open a Powershell session on your VM and at the prompt type:

Therefore in my LAB – my domain controller is to be called art-DC-01 – therefore the command is:


You need to restart the VM for the new name to take effect – and this can be done by typing:

However if you wish to save time, hold off on restarting your machine until you have configured your IP settings.
Configuring your IP settings
As Powershell has advanced – there are now a number of new cmdlets that let you control a huge number of aspects of your Operating System configuration. Once such advance is the ability to configure IP settings from the shell.
From within your Powershell Window type in the following command:

Breaking this command down – some of the parameters might seem a little unfamiliar – therefore:
Given the above the command for my server looks like:

It is also a good idea at this point to configure a DNS server (as in the next step you should install any available Windows updates). You can do this from the shell by using the following command:

Therefore in my LAB I have assigned a DNS server address of 172.31.253.130 using:

Reboot your computer using the

Powershell command and then install any required windows updates.
In Part 2, I will take you through how you can install Active Directory on your new Domain Controller.
If you got this far, you are probably an Exchange Administrator and need to make your life easier. Mailscape can do that for you.
Mailscape is a unique and innovative Exchange management tool that combines all the key elements for Exchange monitoring, administration, and reporting in a single solution.


In this, Part 4 of this ENow blog series, I will take you through the provisioning of your Exchange...