The New Microsoft 365

Microsoft introduced a new product, or at least a new SKU, at Inspire (the new name for the...

One of the best things about Office 365 is that we can always count on new features and functionality to be available. Microsoft is constantly working to improve the services already live in Office 365, as well as working to create new services. Some of the new services added do have an additional licensing fee attached, but Microsoft also adds a considerable number of features to the license SKUs already in-place.
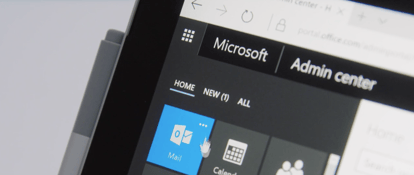
One of the new services that has recently been added to the E3 SKUs is Microsoft Bookings. Bookings has been available within the Small Business versions of Office 365 for some time, but now you can add it to your Enterprise Office 365 tenant if you know where to look.
In this blog post, we’re going to explore how to active and use Microsoft Bookings in your Enterprise Office 365 tenant.
Originally added to Office 365 for small business SKUs, Bookings is an online application designed to assist with public appointment bookings. If your business does dog grooming, tree trimming, or anything else that requires the public to book appointments, then Bookings can be a handy tool.
I do consulting, which at least sort of lends itself to booking appointments in this fashion, so I thought I’d give it a try. Worst case scenario I get a blog post out of it, right?
The process for activating Bookings in your Enterprise tenant is perhaps more difficult that it needs to be. I assume Microsoft does not think many Enterprise tenants will want Bookings automatically activated. They made the process a little bit confusing.
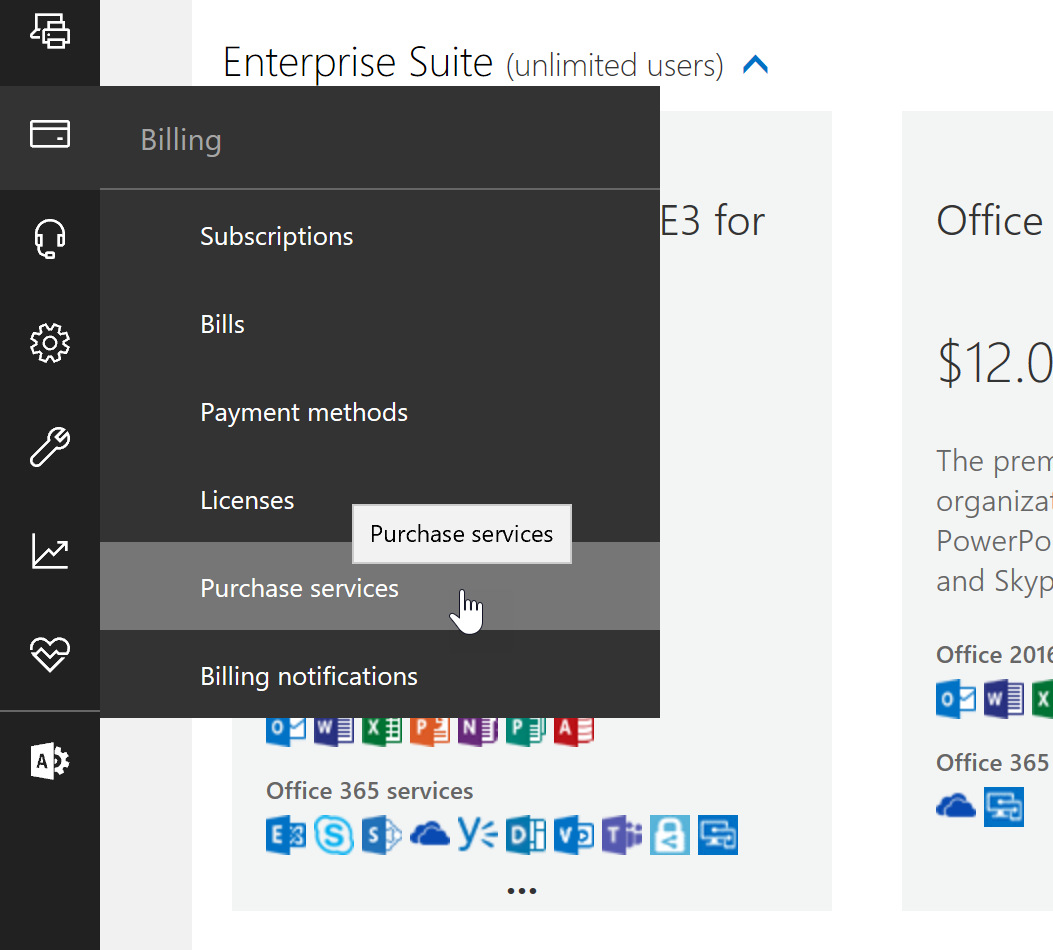
From within the Admin portal of your Office 365 tenant, navigate to Manage your subscriptions > purchase services.
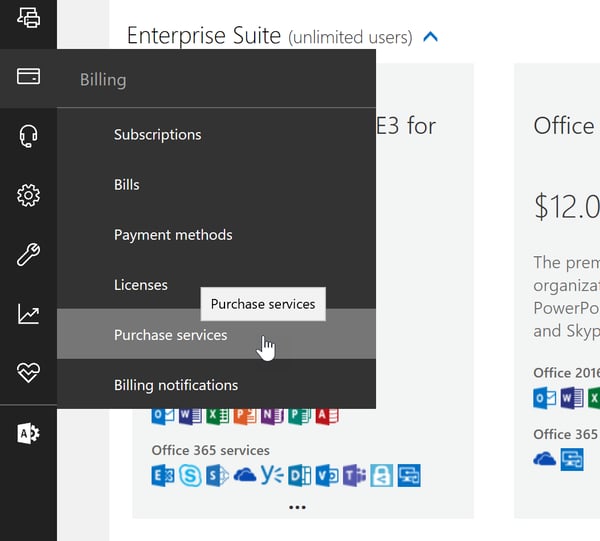
From the Purchase services page, search for search for Business Apps (free). This is the license you will need to add to your Office 365 subscription to get access to Bookings. Assign these licenses to the users to whom you want to make this application available.
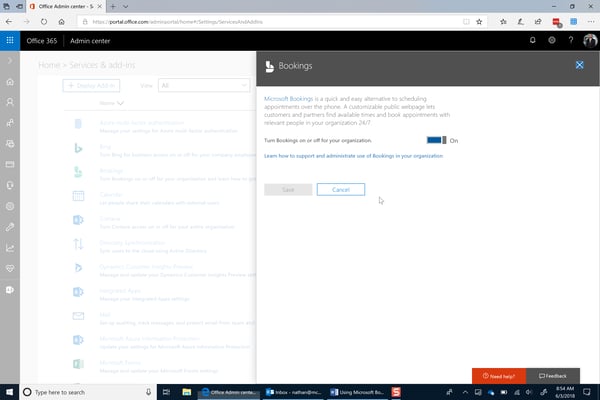
After you have the licenses added, you will also need to go to Settings > Services & add ins > Bookings to ensure that Bookings is turned on.
Once these two things are done, you should get the Bookings icon added to your app launcher within a few minutes.
Once you have the Bookings app available in your app launcher, the next step is to setup your booking page. Launching the Bookings app will take you to the configuration page.
The tab you’ll want to configure is going to be the business information tab.
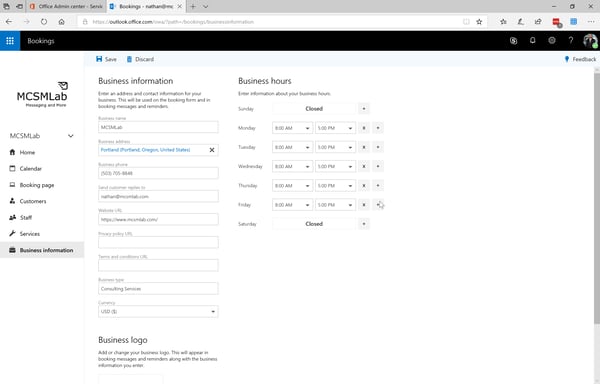
Here you can enter information about your business, industry, and hours of operation. The hours of operation are important for when customers can book your time.
Moving up the menu on the left-hand side of the screen to “Services.” This is where you will enter a list of the services your company provides. This will give customers a menu of services to choose from when they are booking an appointment.
While my primary gig is consulting, you can see in the screenshot below that I am available for “Dog Grooming” and “Babysitting” as well.
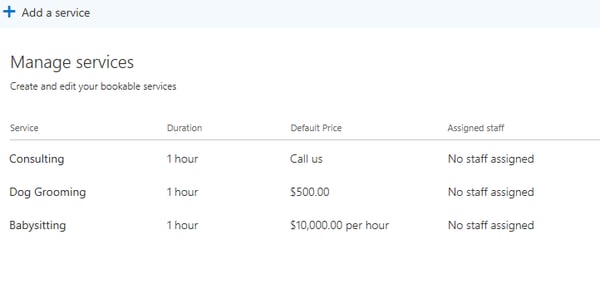
When you select “Add a service” at the top, you will be given an opportunity to name the service, set a price, and create some rules around which of your staff is available to provide this service.
The next tab up is the “Staff” menu. Here you can list the people who are available to be booked, the hours these people are available, and if items booked on their Outlook calendar effect their availability on the Bookings page. A nice future option would be if you could integrate Staff Hub here so that employees with irregular shifts could have the proper availability reflected on this page.
Next up from the bottom is the “Customers” tab. This information will automatically populate with the information that your customers provide as they make a booking. Alternately, you can manually enter customer information here or import it from Gmail or your Outlook contacts. It would be nice to see Microsoft add an “Export” option here in the future.
The “Bookings page” tab is next. This is the page from which you can publish your Bookings page to the internet. You have some options to configure here like the basic color scheme of your page, the scheduling policy including any buffer you’d like to be automatically set between bookings, if you receive email notifications of bookings, and the ability for customers to choose which of your staff they are booking.
The “Calendar” tab shows a calendar of your bookings. This is not your Outlook calendar, so meetings you create there will not show here.
Finally, the “Home” tab shows a basic tally of the booking made through your Bookings page, and some short cut links to configuration options we have covered above.
There is also a Bookings app you can download from your phone’s app store. I looked over the iPhone version quickly and it seems to have almost the same functionality. There are some minor differences, but there isn’t enough different that it warrants much space here.
I’m very much of the opinion that Office 365 should be managed by PowerShell wherever possible. To this end, as I was looking at setting up Bookings I wanted to see what the PowerShell management options were.
Bookings is mostly built on Exchange calendars, so most of the PowerShell management tools are done via the Exchange Management Shell. When you create a Bookings calendar, the back-end creates a User Mailbox with the RecipientTypeDetails of SchedulingMailbox.
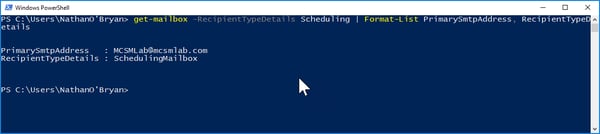
Any management you need to do of that Bookings calendar can be done with standard Set-Mailbox PowerShell cmdlet.
ENow’s Office 365 Monitoring solution is like your own personal outage detector that pertains solely to you environment. ENow’s solution monitors all crucial components including your hybrid servers, the network, and Office 365 from a single pane of glass. Knowing immediately when a problem happens, where the fault lies, and why the issue has occurred, ensures that any outages are detected and solved as quickly as possible. Monitor Your Hybrid - Office 365 Environment with ENow.